
Prijshistorie inzien?
Login of registreer om de complete prijshistorie voor dit product te zien.
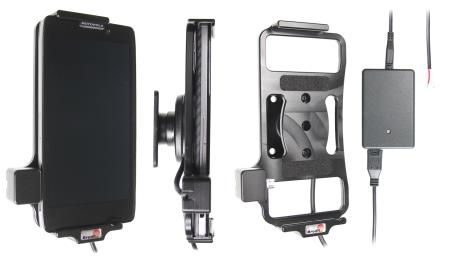
Registreren InloggenHieronder vind je de meest recente nieuwprijzen bij onze directe partners, zodat je zeker weet dat je altijd een gloednieuw product met de beste garantie in huis haalt.
Toch even verder kijken? Hieronder vind je de prijzen bij andere door ons gecontroleerde aanbieders, zoals marketplaces van Bol en Amazon. Ook vind je hier allerlei interessante refurbished producten die een tweede kans verdienen.
Login of registreer om de complete prijshistorie voor dit product te zien.
Registreren InloggenWe hebben voor dit product nog geen reviews
Help anderen en geef jouw mening over dit product. We verloten iedere maand onder alle reviewers 2 x € 250,-.